This guide shows how to send BrandJet events into Attio with BrandJet outbound webhooks. The verified setup delivered a Campaign Reply Received test event from BrandJet into an Attio Webhook received workflow.
Quick answer
Create a live Attio workflow with a Webhook received trigger, copy its private webhook URL, then add a BrandJet webhook endpoint from the normal BrandJet user app at Settings > Webhooks. Use POST, subscribe to the BrandJet events you want Attio to receive, then send a BrandJet test webhook.
Direction: BrandJet sends outbound webhook events into Attio. This is a BrandJet to Attio integration, not an Attio import into BrandJet.
How the integration works
Attio provides a private webhook URL from a live workflow trigger.
BrandJet sends selected event payloads to that URL whenever those events happen.
Attio receives the payload and can use workflow actions to find or update records.
Before you start
You need access to the normal BrandJet user app.
You need an Attio workspace where you can create or edit workflows.
You need to decide which BrandJet event types Attio should receive.
Keep the Attio webhook URL private. Do not place the live URL in screenshots or public documentation.
Step 1: Create the Attio webhook receiver
In Attio, open the workspace that should receive BrandJet events.
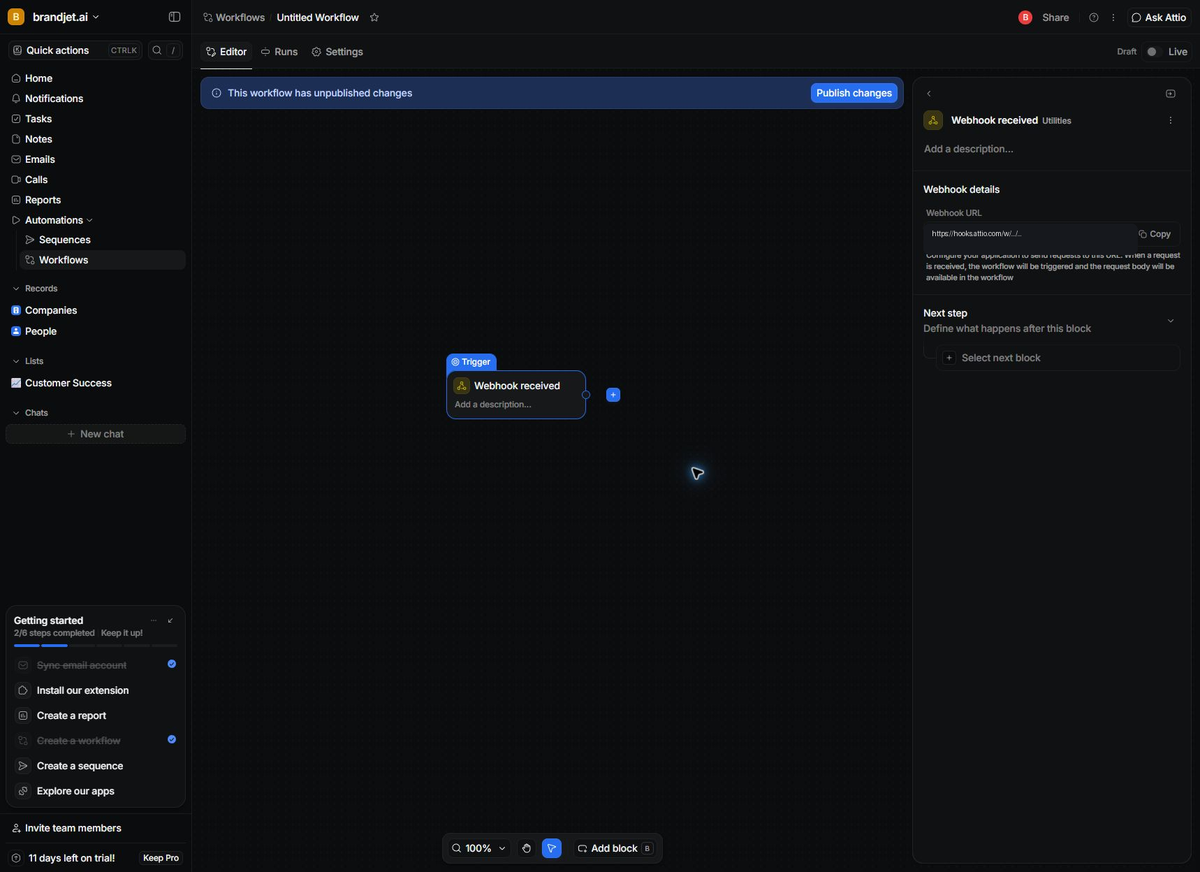
Open workflows and create a workflow that starts with the Webhook received trigger.
Copy the webhook URL from Attio.
Publish the workflow and confirm it is set to Live.
Verified screen: Attio workflow with the Webhook received trigger live and ready to receive BrandJet requests.
Step 2: Open BrandJet Webhooks
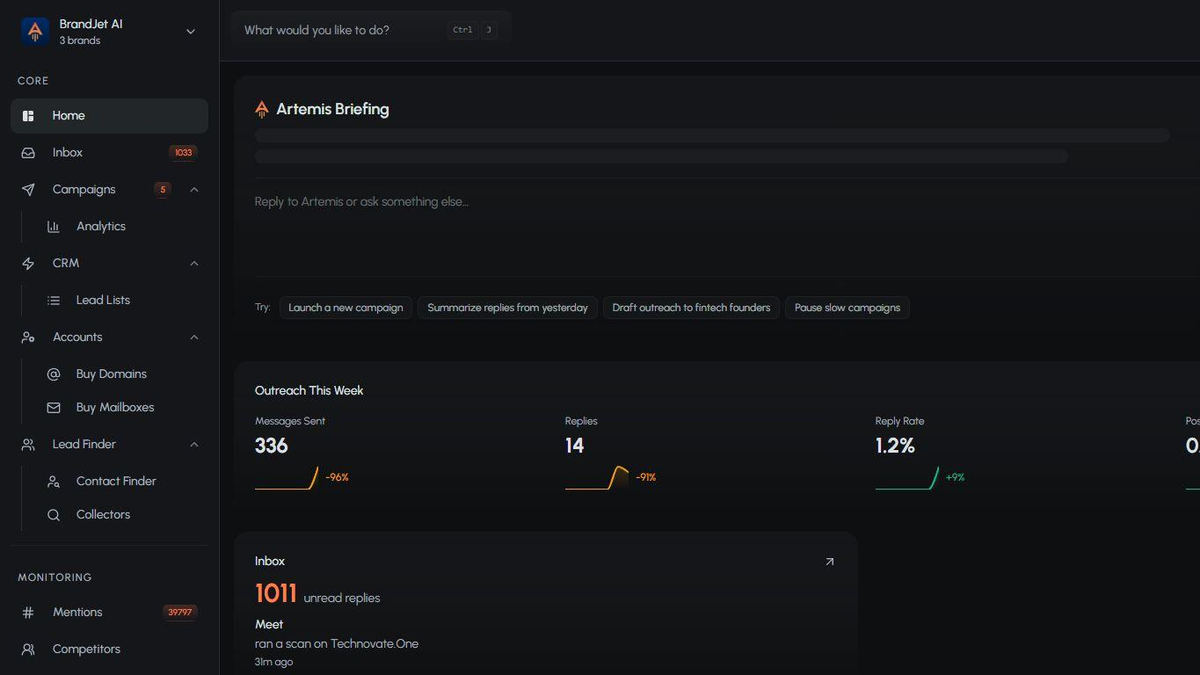
In BrandJet, open the normal user app at /home.
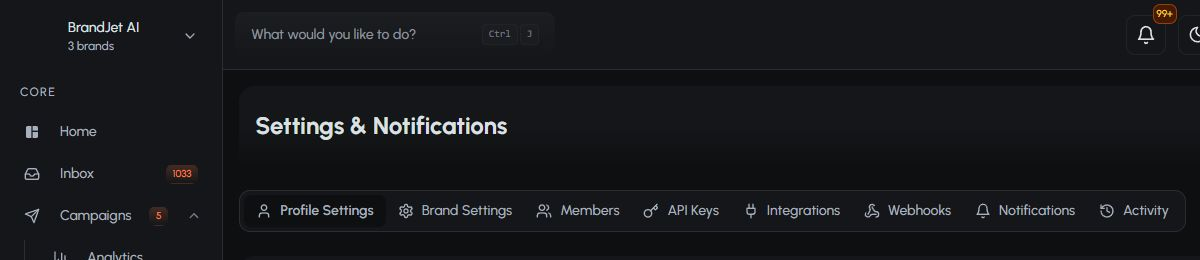
Open Settings.
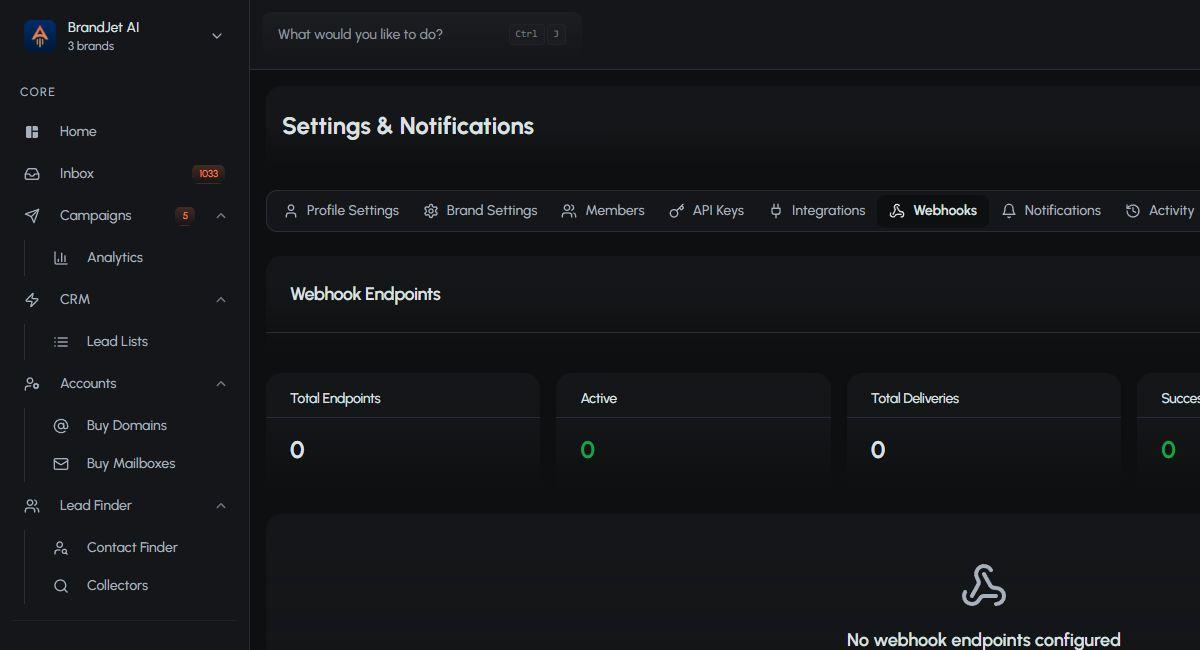
Select the Webhooks tab under Settings & Notifications.
Click path: Open the normal BrandJet user app from /home.
Click path: Open Settings and select the Webhooks tab under Settings & Notifications.
Step 3: Create the BrandJet webhook endpoint
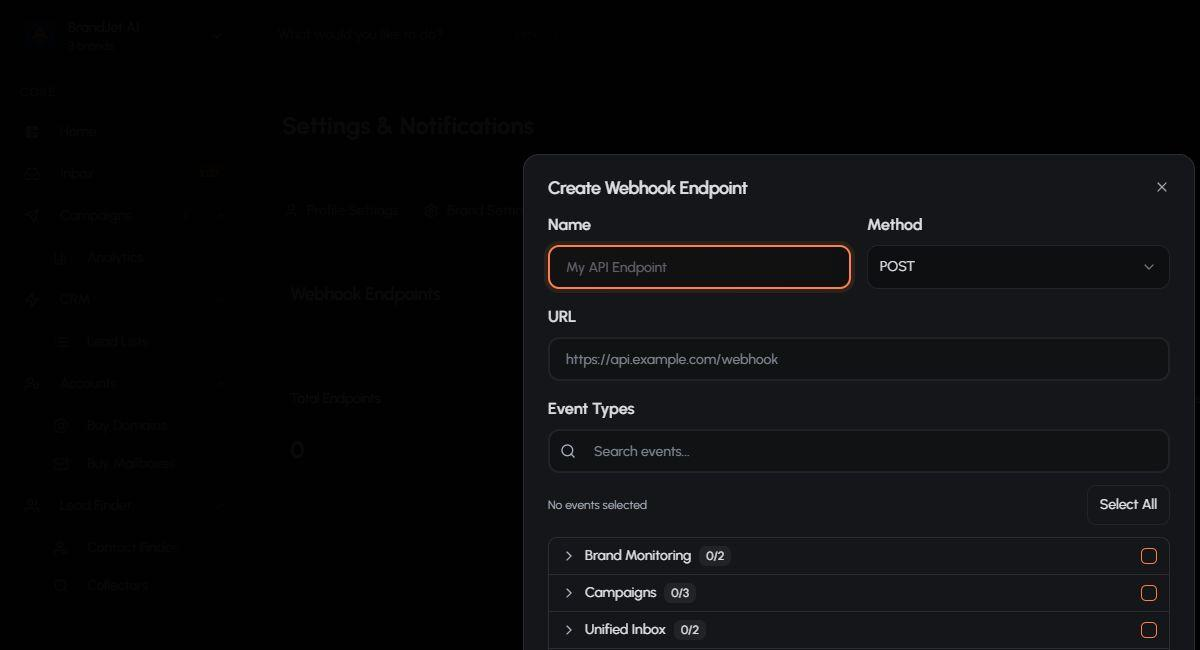
From the Webhooks page, click Create First Endpoint.
Name the endpoint so it is clear that it sends BrandJet events to Attio.
Paste the Attio webhook URL into the endpoint URL field.
Set the method to POST.
Select the BrandJet events Attio should receive.
Keep retries and timeout enabled with sensible values, then enable the endpoint.
Save the endpoint.
Click path: Use Create First Endpoint from the Webhooks empty state.
Endpoint setup: Create the Attio endpoint in BrandJet with POST, selected events, retries, timeout, and endpoint enabled.
Step 4: Send a BrandJet test webhook
Open the saved BrandJet endpoint.
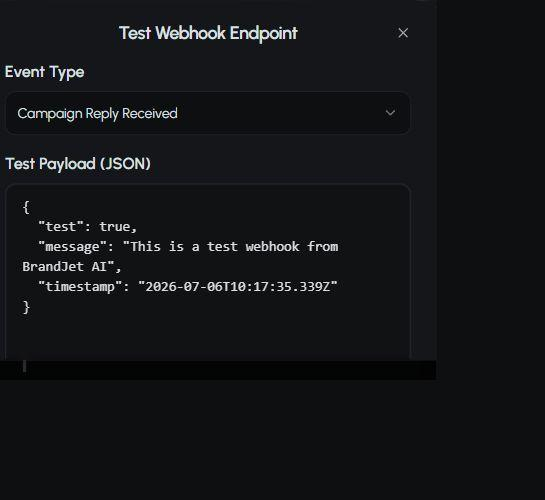
Open the test webhook action.
Select Campaign Reply Received for the test event.
Send the test webhook.
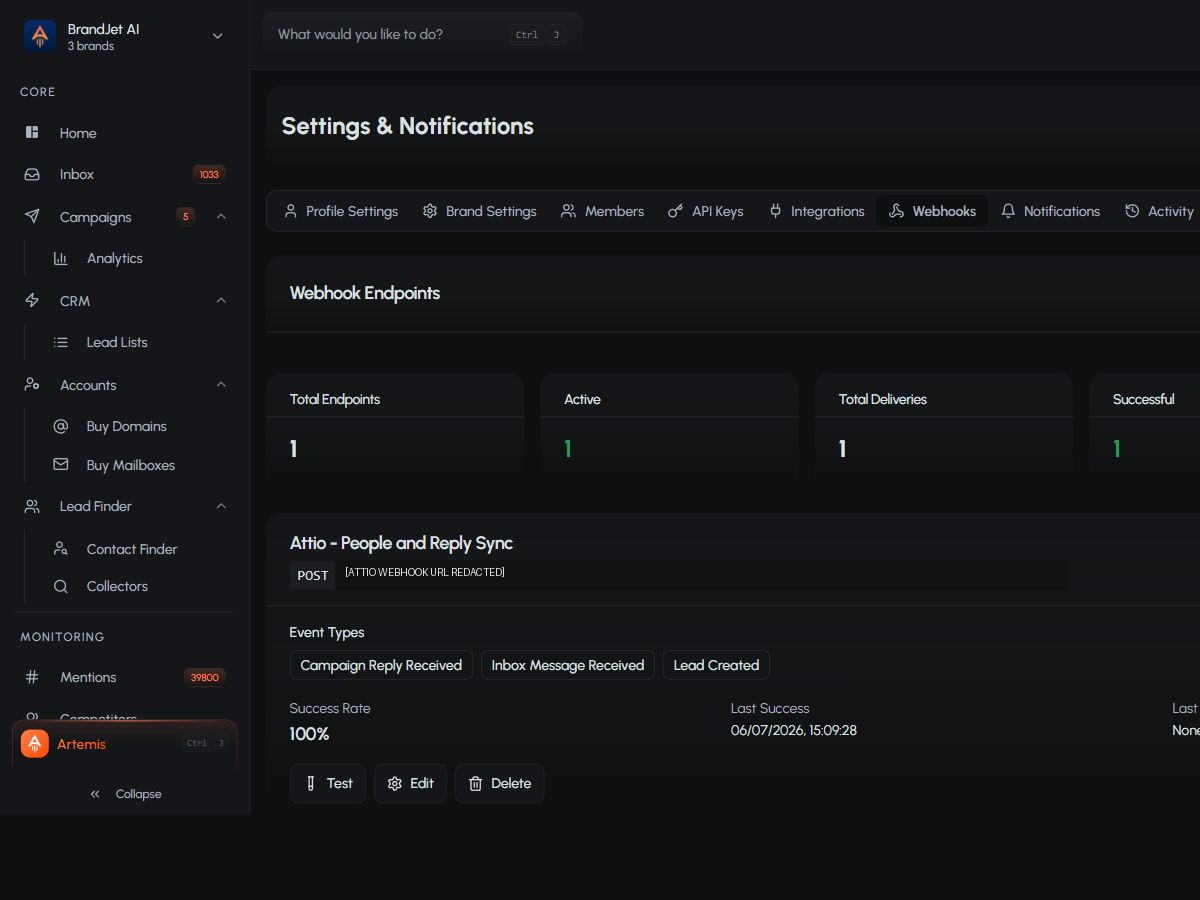
Confirm BrandJet shows a successful delivery with zero failures.
Test action: Send a Campaign Reply Received test webhook from BrandJet.
Verified result: BrandJet endpoint successful delivery, showing 1 successful delivery, 0 failures, and 100% success rate.
Step 5: Confirm the Attio workflow behavior
Return to the Attio workflow.
Open the latest workflow run created by the BrandJet test event.
Review the received payload and map the fields you need for your Attio records.
Use email address as the primary matching field when updating Attio People.
Troubleshooting
No webhook activity appears in Attio
Confirm the Attio workflow is published and marked Live.
Confirm the BrandJet endpoint URL is the Attio webhook URL.
Confirm the BrandJet endpoint is enabled.
Send another BrandJet test webhook after saving any changes.
Test delivery fails
Check that the URL was copied completely.
Confirm the endpoint method is POST.
Check the delivery response shown in BrandJet.
Regenerate the Attio webhook URL if the old one was deleted or replaced.
Attio receives the webhook but does not update a person
Review the Attio workflow action after the webhook trigger.
Confirm the BrandJet payload field you are using contains an email value.
Map the BrandJet email field to the Attio People lookup step.
The webhook URL appears in screenshots or documentation
Replace that screenshot with a redacted version. Treat webhook URLs like secrets.
Frequently asked questions
Which BrandJet events should I send to Attio?
Start with reply and campaign engagement events. Add more events only when Attio has a clear workflow action for them.
Why use POST?
POST is the normal method for webhook delivery because BrandJet is sending event data to Attio.
Why match Attio People by email address?
Email is the most stable shared identifier between BrandJet outreach events and Attio People records.
Is the BrandJet test enough to go live?
The BrandJet test confirms delivery to the Attio receiver. For production readiness, also confirm the Attio run payload and field mapping in your own workspace.
Should the webhook URL be included in documentation?
No. Treat it like a secret. Use redacted screenshots and store the live URL only in the BrandJet endpoint configuration.
Final setup checklist
Attio workflow is published and Live.
Attio webhook URL is stored privately.
BrandJet endpoint uses POST.
BrandJet endpoint subscribes to the required event types.
BrandJet test delivery shows 1 successful delivery and 0 failures.
Attio workflow run and field mapping have been reviewed before live use.